
NOTE: We are not Task Force or affiliated with them. We did not sell these Pressure Washers but do offer some parts for them, as shown below.
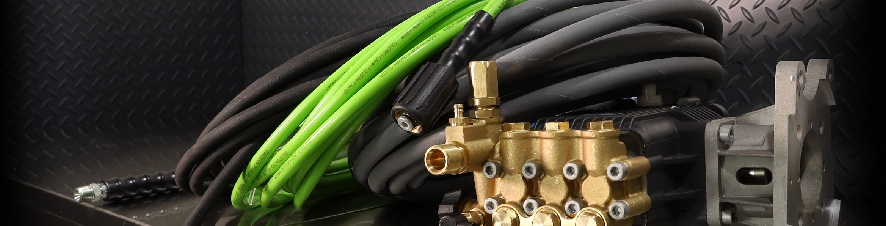
* * * * * 2 Different Hoses were used on the hose reel. The connection is different. Remove your hose and compare to the pictures.
For evey problem there are a
number of troubleshooting steps you can take to easily find a solution.
Click the title of the issue, and the steps will appear below.
Motor will not start
- The On button on the ON/OFF switch must be depressed before the machine will activate.
- Push the ON button in firmly to start the machine.
- If the machine will not start, locate the Reset
button on the G.F.C.I. plug at the end of the electrical power cord and
depress in. The G.F.C.I. electrical plug is a rectangular shaped
connection at the end of the power supply cord.
- The motor should start and stop immediately creating water pressure between the Powerwasher and the gun trigger mechanism.
- You are now ready to operate the machine.
- Squeeze the trigger to begin operation.
- If the machine suddenly stops during this normal
operation, determine cause by examining water supply and electrical
G.F.C.I. connection.
- Push the OFF button in located on the front of the
machine and, if necessary, re-connect the water supply or reset the
G.F.C.I. electrical connection and push the ON button in again.
House Circuit Breaker Switch Disengages
- The house circuit breaker switch will disengage if the electrical amperage demand exceeds the rated limit on the breaker.
- Remove the Powerwasher G.F.C.I. electrical plug from the wall outlet.
- Determine if additional appliances are using same
circuit as the Powerwasher and disconnect those appliances from the
same circuit.
- If the G.F.C.I. plug becomes wet, allow the plug to completely dry before re-use.
- Reset the breaker in the electrical circuit box of
your house and reset the G.F.C.I. on the electrical cord of the
Powerwasher and push the ON button in located on ON/OFF switch.
- Use only recommended extension cord length and amperage from the manual.
- If the electrical cord is damaged, do not attempt to repair yourself.
MOTOR ON but NO WATER coming through End of Nozzle
- Examine Garden Hose Quick Connection to be sure it is properly installed.
- The water inlet nipple must be threaded onto the
plastic machine inlet connection at back of the Powerwasher and the
quick connector must be threaded onto the end of the garden hose.
- Push the quick connector completely over the inlet
nipple so that it secures a tight connection. If the water inlet nipple
will not thread onto the end of the inlet connection, there may be an
additional garden hose washer in back of the wire mesh gasket screen
filter.
- Remove it and reconnect the water inlet connection.
The washer portion of the gasket filter is adequate to stop any water
leakage.
- Completely open faucet so that there is maximum water flow to the Powerwasher.
- Squeeze the trigger on the gun & hose. This will allow a steady stream of water to flow through to the turbo nozzle.
- Release the trigger and push the on button in and begin normal operation.
Pressure Hose Connection WILL NOT Thread on the Metal Outlet Connection
- Remove the outer cover plastic cap from the metal outlet connection. Retain the plastic cover for storage.
- There is a small plastic plug inserted into the interior of the outlet connection.
- Remove the plug by using a long nose pair of pliers or a flat head screwdriver.
- Grasp the lip of the pale colored plug and pull out. Retain the plug for storage.
- Re-connect the high-pressure gun & hose to the outlet connection.
- Do not use pliers to tighten.
- You may now begin normal operation.
Turbo Nozzle Malfunction
- At every start up, aim the nozzle end of the turbo nozzle directly at the ground and squeeze trigger.
- This will permit the nozzle spray devise inside the nozzle chamber to seat itself correctly.
- Raise the nozzle to the horizontal position to begin normal operation.
Variable Nozzle malfunction on round shaped shaft wand
- Grasp the collar of the variable nozzle and slide forward away from gun to activate a low-pressure spray.
- Grasp the collar of the variable nozzle and slide the nozzle toward the gun to activate a high-pressure spray.
- Turn the nozzle counter-clockwise to increase angle
for a fan spray in either the low-pressure position or the
high-pressure position.
- For normal operations, the variable nozzle must be
in the low-pressure position to activate the chemical suction devise
inside the outlet connection.
Chemical Solution Reservoir is clogged
- Remove the variable nozzle from end of the gun and hose bladed extension.
- Insert plastic tubing in pail of liquid detergent or clear water.
- Squeeze trigger and observe siphon of liquid through plastic tubing.
- Reconnect variable nozzle to end of gun and hose
assembly and set nozzle at low-pressure position and begin normal
operations.
- Repeat process until siphon of liquid is accomplished and reconnect nozzle.
- If liquid will not siphon through the plastic tubing, make sure low-pressure setting is in correct position.


 California Residents